3D Scanning with Kinect & Skanect
HOW TO 3D SCAN WITH SKANECTHardware Requirements: Microsoft Kinect and Skanect Software
Platform: Recommended Mac: OS X 10.10, Macbook Pro 2012 or Macbook Air 2013.
Step 1: Download Skanect:
http://skanect.occipital.com/download/Note: Make sure to check the compatible version of Skanect for Mac OS X
Step 2: Extract the downloaded zip to the folder ‘Applications’
Step 3: Now let’s edit the software settings.
Open Skanect
Go to NEW
Make sure your settings match those in the picture below:
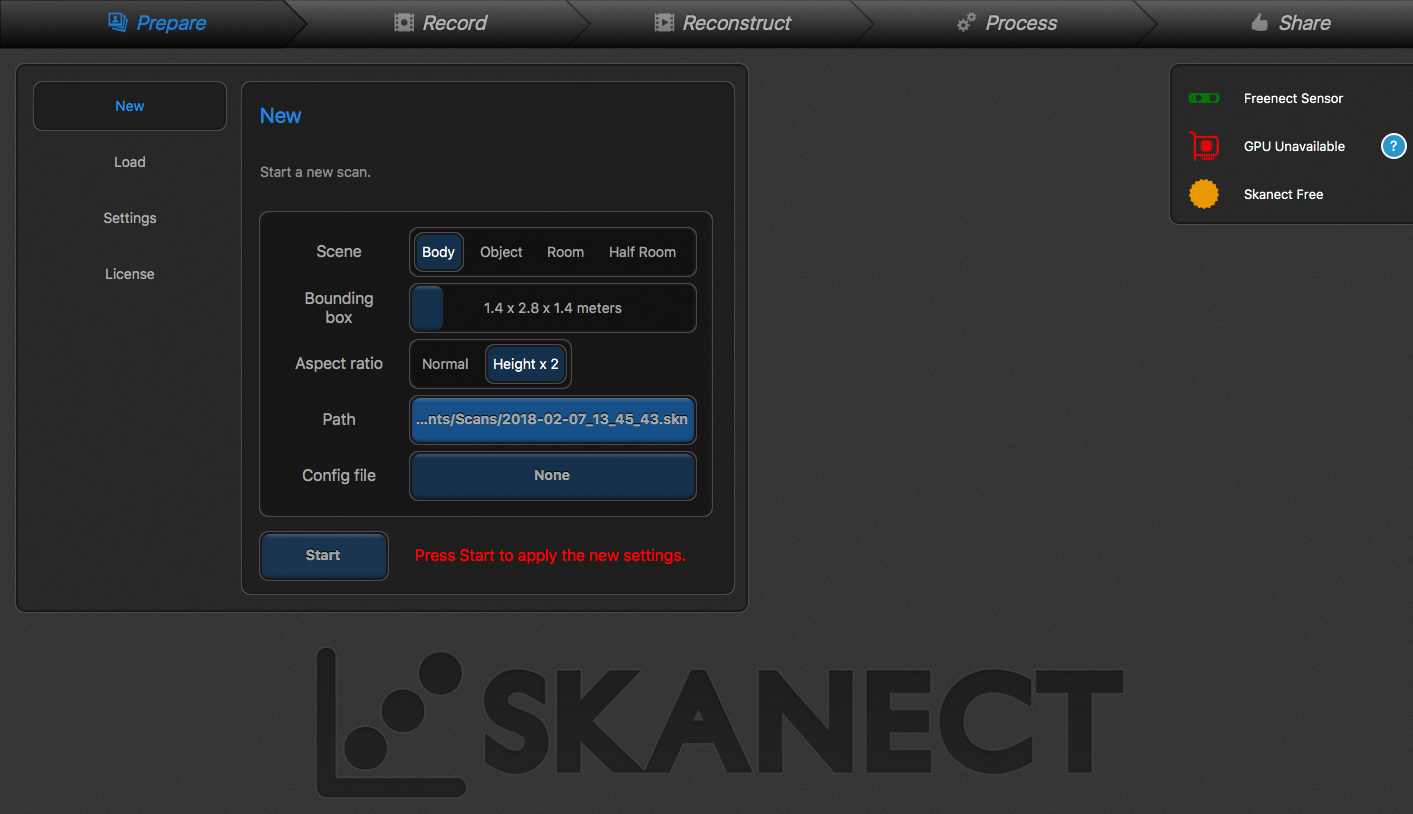
Once the settings are uploaded, Press START.
Step 4:
A screen will come up showing the bounding box in the middle. The infrared and video images are on the right.
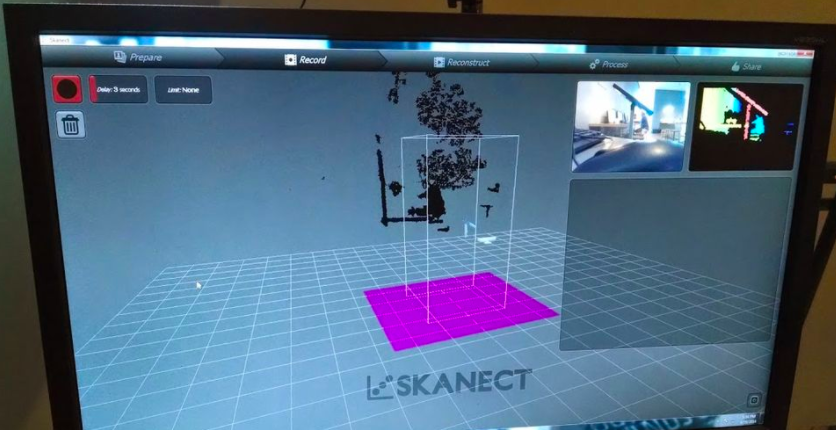
Tip: For the mesh to appear properly, make sure the lighting is consistent.
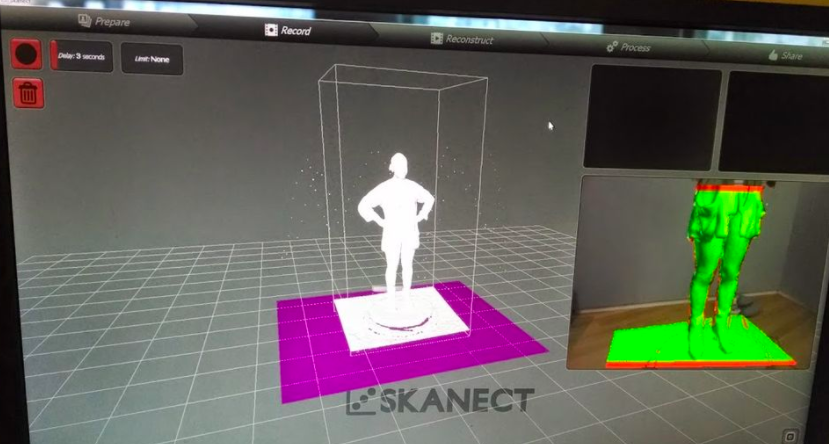
Step 5: Hold your Kinect up level with the subject's body. Press RECORD.
The Kinect will begin recorded the depth (red) and the color (green). Make sure the subject’s depth is registered on the screen which should look something like this:

Important note:
As your subject is in motion, slowly move the Kinect in an up and down motion making sure to get the top of the head all the way to toe or however you want your final model to be. You can walk around your subject to register perspectives from every angle.
As you are scanning, be sure that you are getting a high frame rate around 18-24 frames. If you get below 18 you have to move your Kinect faster. You can monitor this by looking at the white numbers at the bottom of the screen. These numbers can also aid as a way of keeping your subject in alignment. If you keep the numbers in the center of your subject as you scan head to toe you can be sure your scan will be straight.
Step 6: Cleaning up your scan:
Once your subject has done a full rotation press the RECORD button in the top left corner again to stop the scan.
Now that you have a full body scan you have to do some post processing to get it ready to print.
First is making it watertight.
Go to the PROCESS/WATERTIGHT option.
Choose smoothing LOW and press RUN.
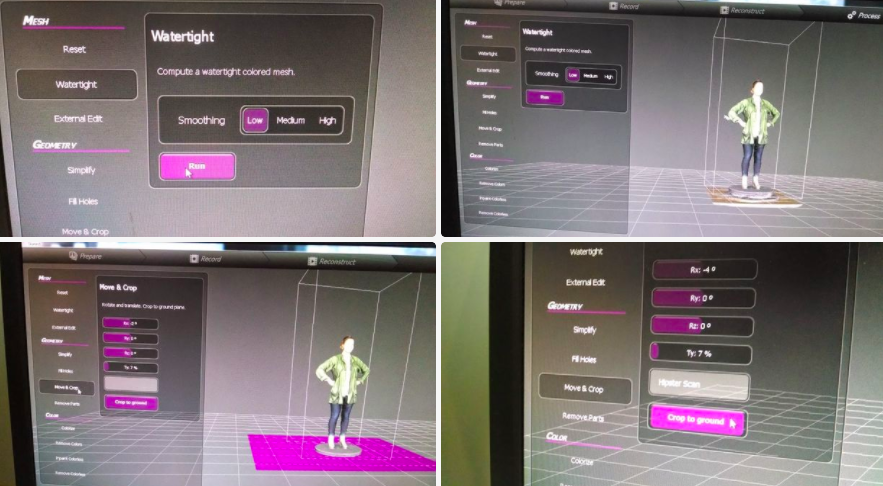
Now your scan will have color. But it may not be straight or have a flat base.
Now we have to use the MOVE & CROP tools.
Use the SLIDE BARS to adjust the X, Y, and Z axis of your scan to make it flat and straight.
Make sure your base is parallel with the X Y plane as cropping will cut off anything below it to make a flat base.
Type in the name of your file in the TEXT BOX.
Press CROP TO GROUND.
Now, let’s begin exporting our 3D Model.
Step 7: Exporting Model
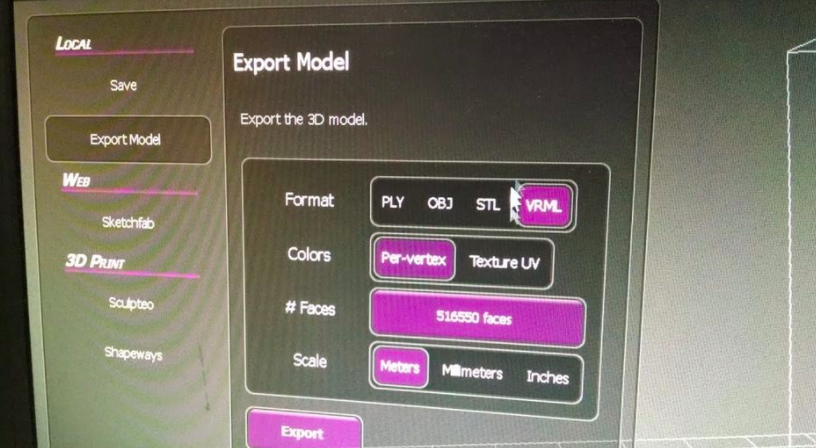
To export it to your laptop, go to SHARE and the export menu will open with a LOCAL option. Under LOCAL go to EXPORT MODEL and use the setting seen in the picture above to export for printing. It is important to choose VRML as the file type. This file type reads both shape and color. Click EXPORT and you are done! Now you can use that file to upload to a 3D printer of your choice.
If you wish to 3D print this model I suggest using SHAPEWAYS.COM and uploading it to be printed in FULL COLOR SANDSTONE.
The New School has 3D Printers available, if you wish to print your model, you may have to export your final model in OBJ or STL format (for TNS).
Check this link for more information on the Making Center.
Check this link for more information on the 3D printing Lab.